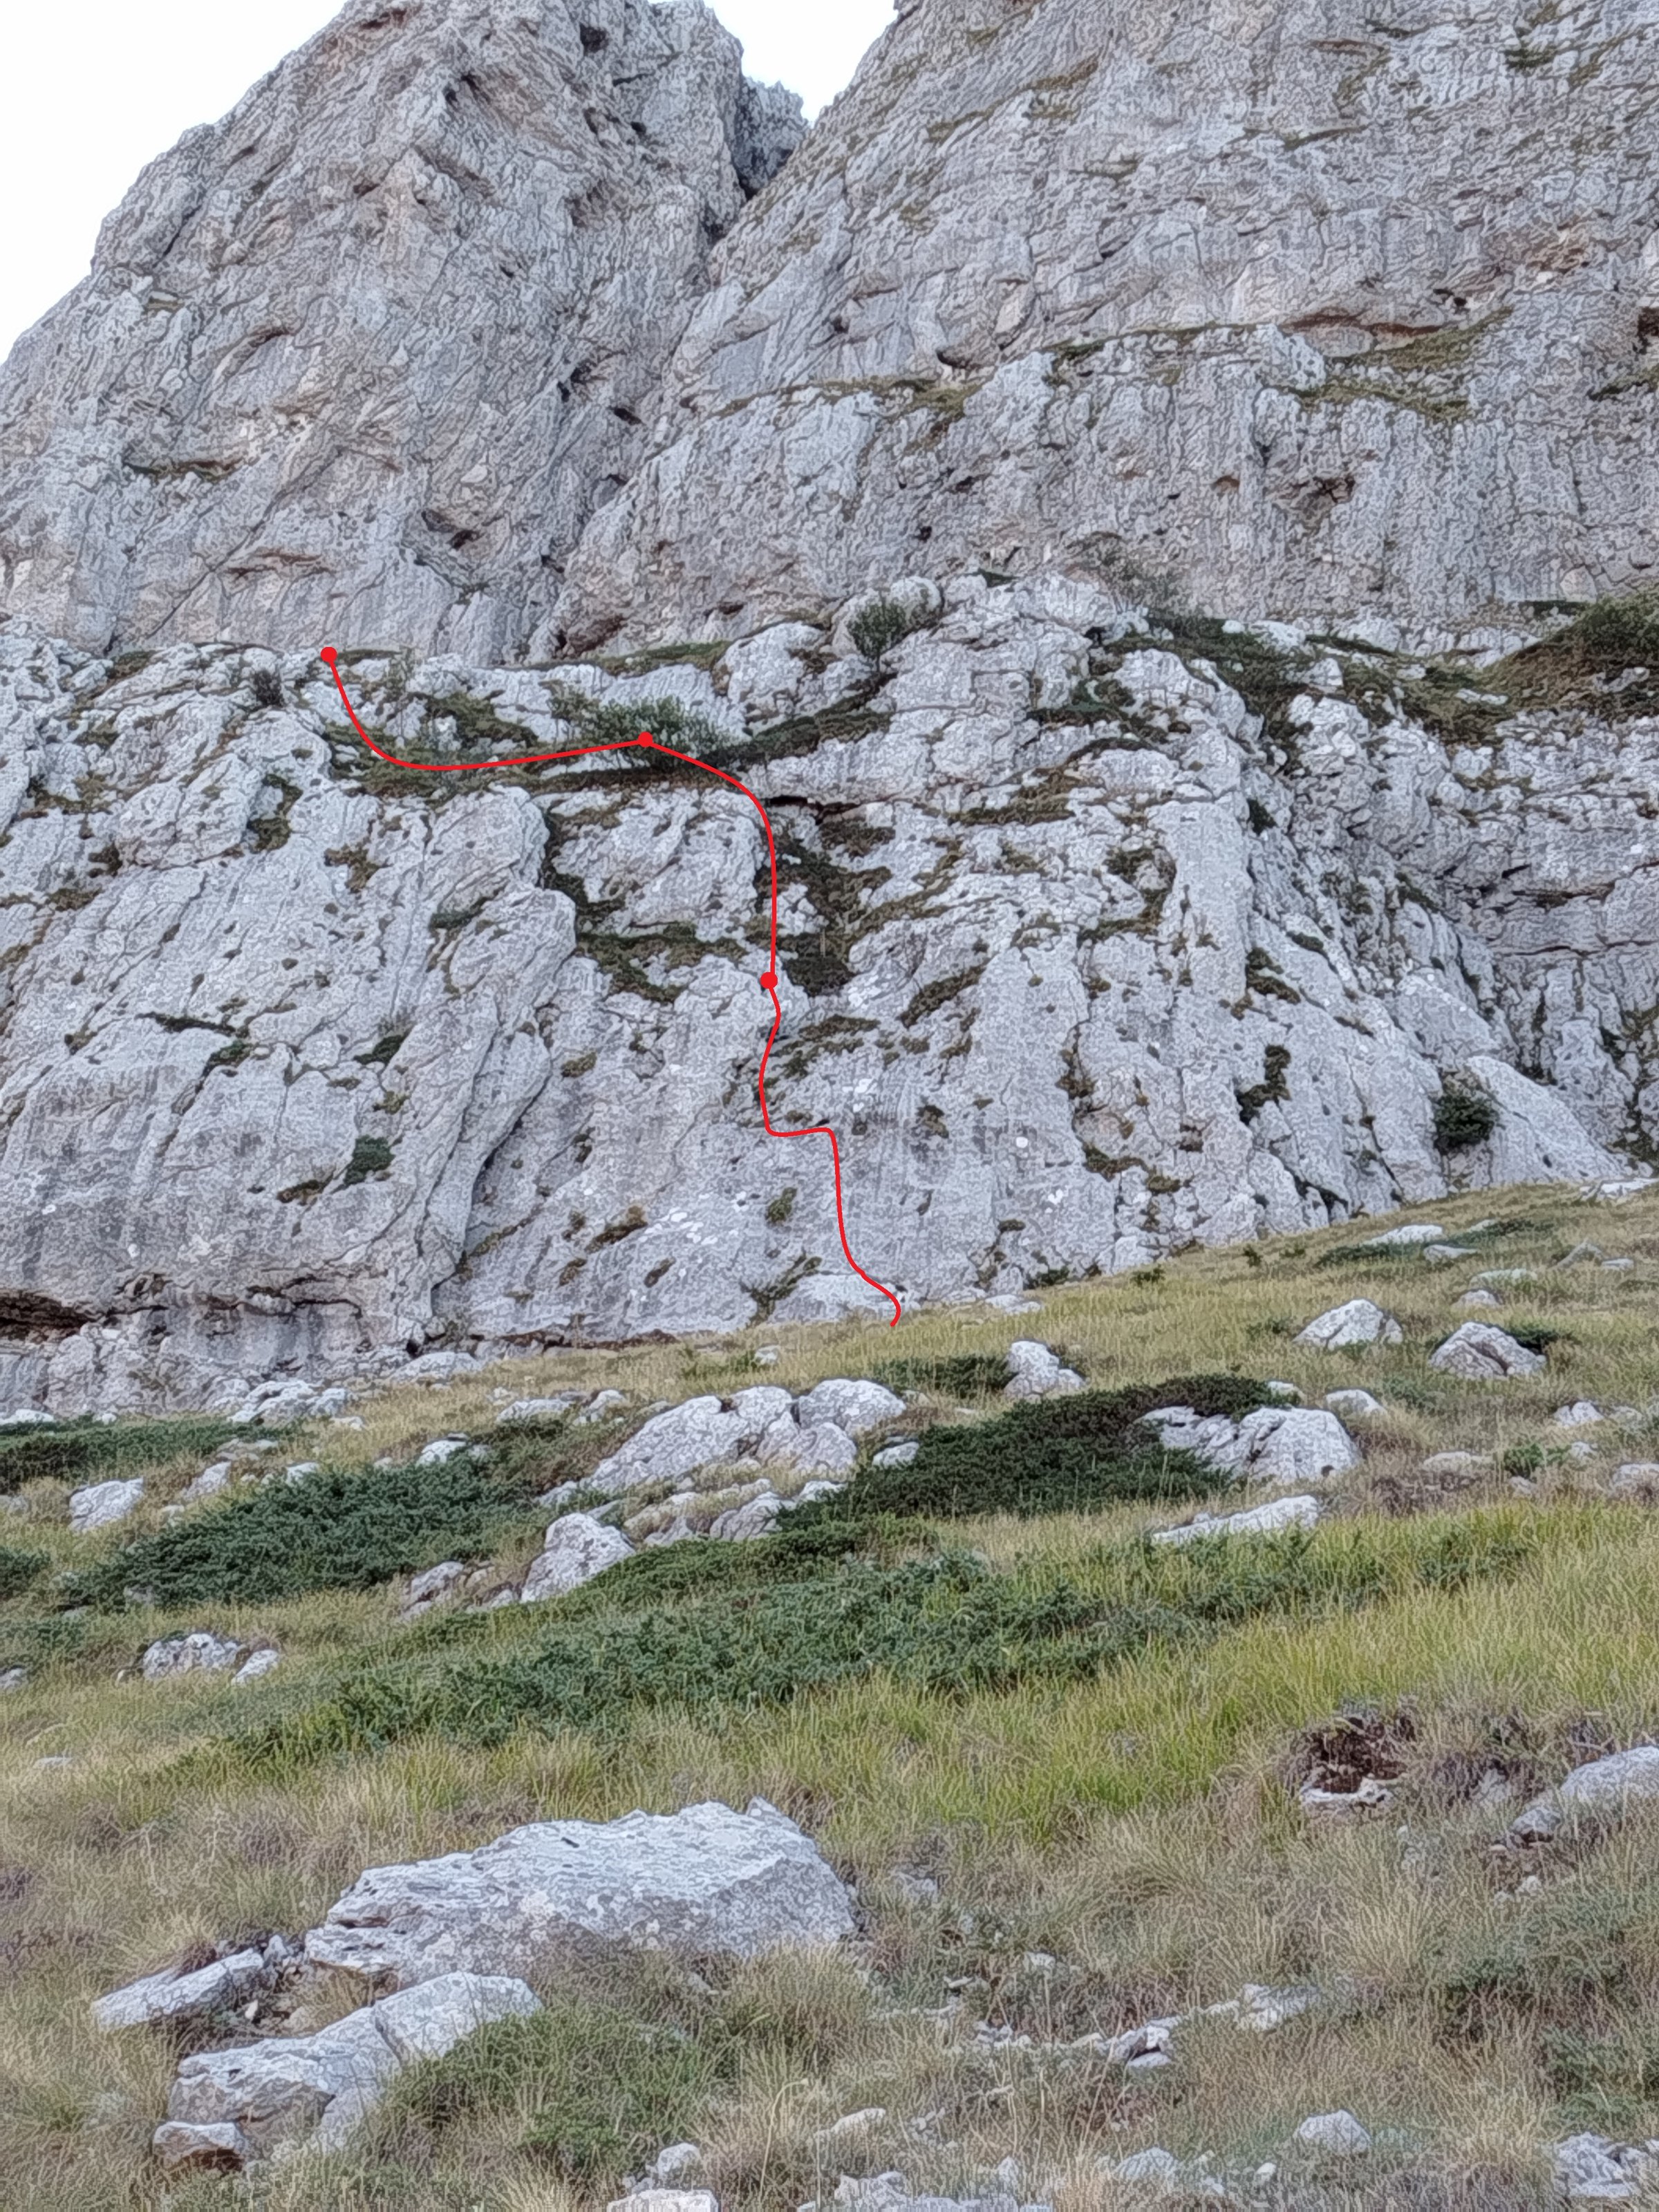
The route “Fasaiokatsiko” (VII+, 150m) was completed and climbed on 21/9/2025 by D. Giounis - Ch. Zonios. A. Mouftoglou also participated in the initial attempt made on 7/9/2025.
The line moves at the rocks before the first large ledge on the northwestern face of Astraka, at the far-right end of its final section.
For the 1st pitch (VII+, 25m), we start on an easy, protectable slab before reaching a positive, bare slab. From there, long, technical, and difficult moves lead to a small, awkward stance. This is where the crux sequence begins, culminating in a leftward traverse relying on friction footwork. The entire section is protected by 4 bolts, though only the final traverse can be aided (without a clipstick). Exiting the traverse is no trivial matter; it requires composure on a small slab with micro-cams (small nuts/stoppers) until reaching the dihedral. There, a Camalot #3 is placed for protection before finally moving to a reasonably decent stance to set up the belay on 2 bolts.
For the 2nd pitch (V-, 30m), we continue upwards over an easy slab featuring vegetation and some loose blocks, adequately protected by medium-sized cams and nuts, to reach a dihedral. This leads past a small overhang (equipped with a bolt) and ends at a ledge with a cluster of small trees, where we set up the belay using pro.
For the 3rd pitch (IV-, 35m), we follow the leftward line across grassy terrain to reach an easy, low-angle ramp, finishing on a low-angle slab where the belay is set up on large blocks.
We then continue for 60m, heading up and to the right across low-angle grassy terrain (I/II) to reach the final ledge.
To repeat the route, you need a set of nuts, a set of cams up to Camalot #3, and optionally some pitons and a hammer.
To reach the start of the route, it takes about an hour from the refuge. First, descend towards the Krouna spring, then head to the junction for the summit of Astraka. From there, continue for a few meters, and just before the path begins to descend, proceed straight ahead towards the visible rock formations.
For the return journey, if we wish to proceed to the refuge, we continue left along the ledge system, crossing various gullies, and perhaps negotiating a few short sections rated III+/IV-, to eventually arrive beneath the “Meniscus” tower and from there reach the refuge. Alternatively, if we want to return to the base of the route, we continue right along the ledge and then head downwards to find an exposed wild-goat path that leads to a point slightly to the right of the route's base.
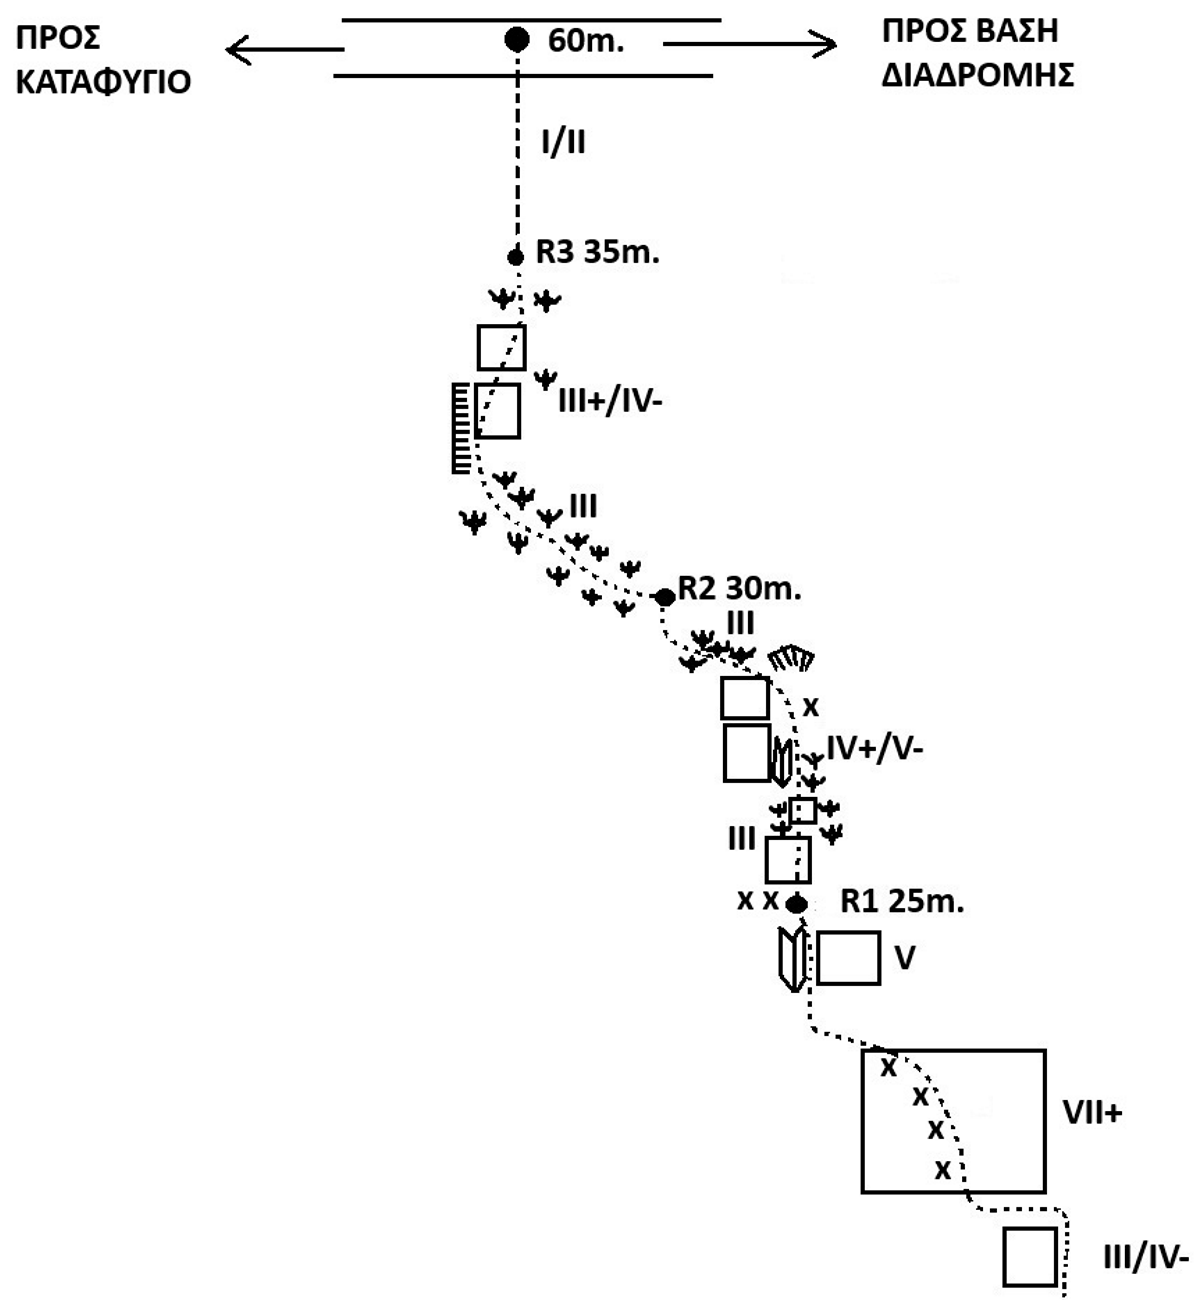
Sketch of the route.